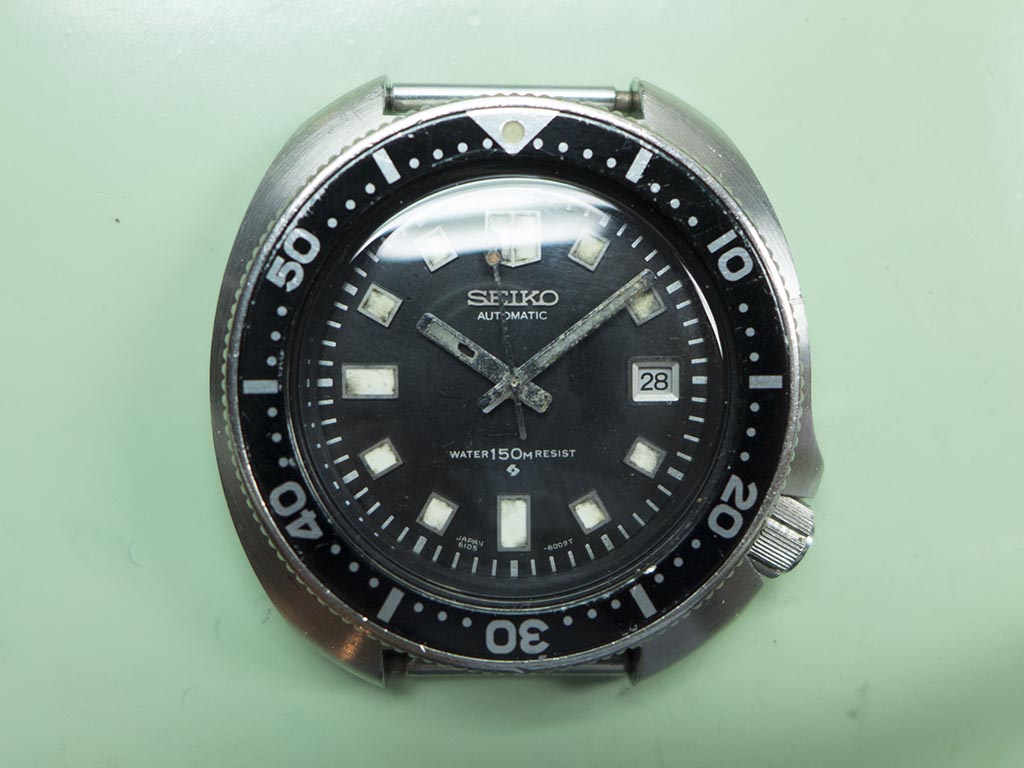
Every now and then I get a watch in that seems to fight me at every turn, and this particular 6105 is one of those watches! It arrived looking a little worse for wear, the lume was starting to degrade on the dial and the handset was well advanced with the rot. It had an aftermarket insert fitted but didn’t actually look to bad at first sight.
With the movement removed it looked exceptionally grubby but I still didn’t realise what was in store.
When I gave the balance a flick to see if it was free it felt like it was suspended in treacle, a look from the side showed the hairspring coils were touching the bridge, not so good.

The dial and handset were removed (the dial spacer was also missing) and the view from the top didn’t fill me with a lot of confidence, some missing screws and what was that little lever doing obstructing the jewel hole? The date wheel was filthy with some very sticky residue so that was gently cleaned off before it was removed. To clean these I just use spit and a cotton bud, if you use anything more aggressive such as solvents or abrasive creams the numerals will just disappear in front of your eyes. Don’t ask me how I know!

With a bit of patience and some effort it eventually came clean without any damage, phew!

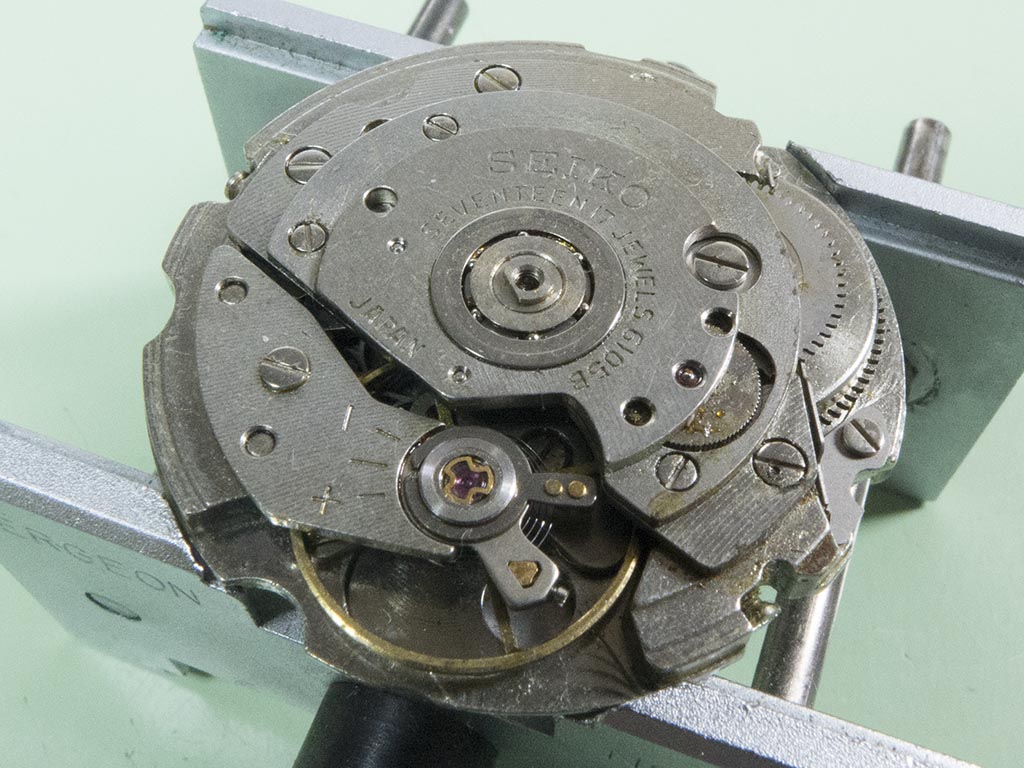
I removed the top plate and the lever was revealed as being the end of the date jumper. The top plate hadn’t been screwed down properly and it had sprung out of it’s position in the mainplate. It was also stuck solid to the top plate with some sticky residue, and there were also spots of the same gunk in various places on the plate.

Under the plate the top of the movement was saturated in this sticky stuff, it had a consistency like resin from a tree and stuck to everything.

Here’s the underside of the hour wheel after I managed to prize it free from the canon pinion.

And here’s the top of the plate after I managed to gently pry everything free without damaging anything, what a mess! The balance jewels and caps I had to poke out from below with a piece of pegwood as they didn’t want to come free.

With the balance removed you can see the coils are welded to the bridge with this residue, they are also misshapen which isn’t good. The staff and impulse jewel are also plastered in this stuff and even at this early stage I was thinking the balance/hairspring were toast! I couldn’t remove the caps from the jewel chatons as the were stuck solid, I was hoping they would come free in the cleaning machine.

The autowind assembly was persuaded away from the movement, again everything was solid with thick, sticky gunk.

It didn’t get any better the deeper I went, that residue was everywhere.

This is not what a pallet fork and bridge should look like! Although it looks fluid this stuff was actually very viscous, almost solid in fact, and very difficult to remove.

The motion work bridge took some persuading to come free with damaging any wheels. The hacking lever took almost twenty minutes to remove on its own, I was terrified of bending it like a piece of silver foil. I did actually bend the top section slightly but not badly enough that I couldn’t get it back to normal once it was clean.

Eventually the mainplate yielded all of it’s components without destroying anything, or so I thought.

The inside of the barrel looked like the bottom of a blocked sewer!

Still everything was removed now so it was all loaded into the cleaners basket so that my vintage Vari-Matic could do it’s thing.


I gave it three full cycles with no drying time on the first two, that should do the trick! Erm …. no it didn’t, this is what the larger components looked like after that cleaning blitz, still coated in the stuff!

I placed the parts back in the basket and put it in a tumbler of warm horozone, I then placed that in my ultrasonic bath for 30 minutes. Once that was done I loaded the basket back into the Vari-Matic and gave it three more cycles, again with the drying cycle only on the last one. This was the result, very little change although the balance did look a little healthier.

In the end I had to go back to basics, a piece of sharpened pegwood and a lot of time and effort got rid of the rest of the muck, then it was back into the cleaner for one last cycle.

And here was how the larger components looked afterwards, a huge improvement.

However, the smaller components still need a lot of hand cleaning with pegwood and Rodico, it seemed to take forever. It took seven cleaning cycles, a change of cleaning chemicals mid way, a tumbler of horozone and 30 minutes in the ultrasonic bath, then hours of cleaning with pegwood just to get the components into a position where they could be inspected!


Once everything was finally clean and inspected the reassembly could begin, starting with the mainspring as is usual for me.

The balance, pallet fork and curb pin failed inspection, the balance hairspring was too far gone to attempt correction, the pallet fork had a loose end stone and the curb pin was loose in the regulator arm.


The balance was replaced with a NOS item, and the pallet fork and curb pin ( I actually swapped the whole balance cock to save time) were substituted with good serviceable examples I had in the parts drawer.

The wheel train went together next.

Then the ratchet wheel and balance assembly….

….followed by the autowind assembly.

The movement was flipped over and reassembly started on the calendar side, here the keyless work is back together.

The calendar components fitted ready for the top plate.

And almost ready for the dial and hands, as I mentioned earlier the dial spacer was missing.

Luckily I had one in stock so now it was ready for the dial and handset!

In the meantime I’d removed the lume from the hands and cleaned and polished the frames as best I could, they were then sent with the dial to James Hyman for a relume. This is the result, a top job from James as usual.

The dial and hands fitted.

It was almost ready for recasing apart from the fact that the movement spacer didn’t have a spring fitted, however a NOS one was plucked from my dwindling stock!

This is what it looks like fitted.

The movement was then recased, it won’t win any beauty prizes but considering what it was like when it arrived it’s come a hell of a long way. More importantly it’s beating away very healthily.

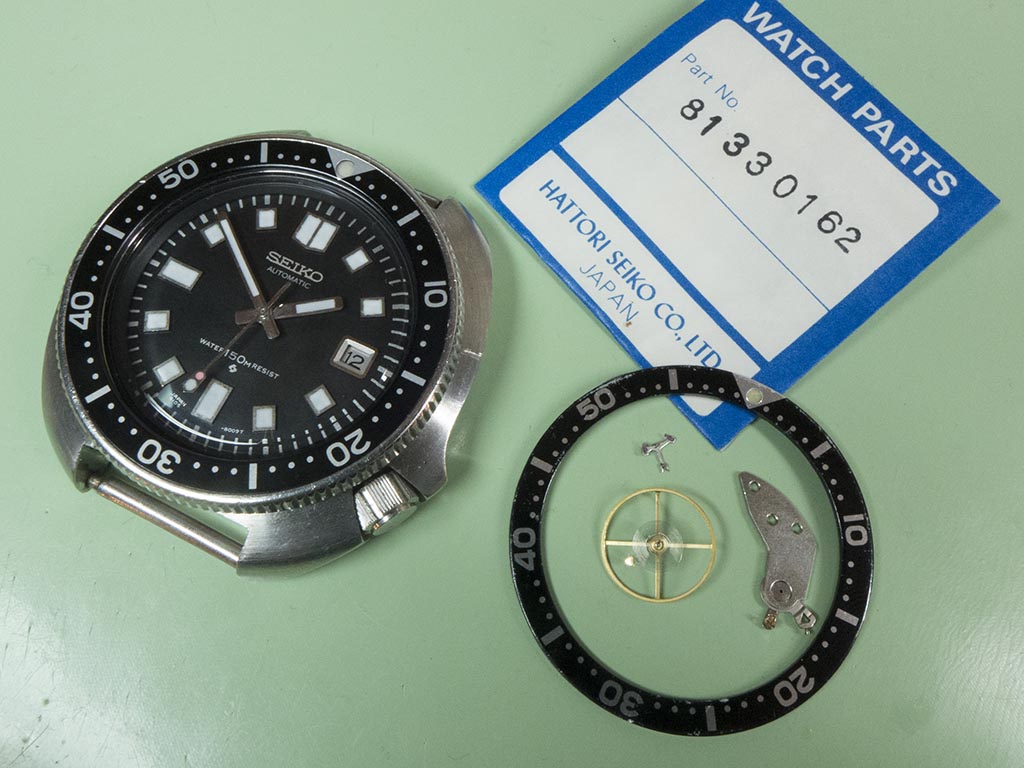
The final touch was to remove the flaky aftermarket insert with its shiny finish and small pip and fit one of yobokies excellent reproduction ones. What a transformation!


A picture with it’s replaced parts.
And a peep at the caseback shows it has a manufacture date of December 1974.

I think all the sticky, viscous residue was decades old engine oil. Someone must have put a few drops of 20/50 in there to “service” it at some point, possibly it had begun to lose time or had developed a fault. The oil stopped the movement dead and the watch was abandoned, allowing the oil to go off and thicken up over the years. I’ll be very glad if I never see one as bad as that again!

Dear Watchbloke,
I quite enjoyed this account of your travails (though am also sorry they were needed). A couple of years back, a lesser watch came to me in roughly comparable condition…and I think your estimate of old 20/50 is probably correct. You got very much further with this one than I did. I had to give up.
And…I have an “identification question” for you…in case you want to tackle it. There’s a fellow here in the States who Ebay’s allegedly NOS Seiko 17 jewel autowind day-date movements, The one in question is a cal. A-361.1…though nowhere on the photos of it can I see “Seiko” or any other maker’s mark. Nor can I find info on such a caliber. Could this indeed be a Seiko product…in case you know?
Thanks, esp. for your wonderfully well documented and informative posts. I look forward to them with relish. Regards, Chuck
Sent from my iPad
>
LikeLike
I’ve never heard of a Seiko A-361.1 movement I’m afraid Chuck!
LikeLike
Where can I get Seiko watch plastic dial spacers from? Thanks.ie Seiko 7009-8150
LikeLike
I believe Cousins have them in stock
https://www.cousinsuk.com
search for their part number SEI844283
LikeLike
This was an ordeal!
Duncan you can somewhat blame me for this. I bought this and sold it on and was gonna be sending you it at some point or the next owner…
The chap I bought it off said he was the original owner and he had never got round to fixing it. It was sold to me as parts or not working and his description mentioned the following:
‘I’m sure it could be brought back to life by any competent watch repairer’….
Well, there ya go! I guess that had to be you in the end. I spoke to Phil about this when he got it and I helped him a little with the costs as I felt sorry that it needed such work and I presume money to get it back to this state.
What a great restoration, one of your best reads on here I think and a superb job in the end.
Oh and I can assure you I did not ‘attack’ this watch. WHen I removed the case back to have a look that was as far as I got. It looks to me like someone really knacked that watch up. I wonder if the previous owner attempted the fix it seems he had done…by sticking some engine oil in there! That’ll do it! 🙂
LikeLike
I think the old oil had been in there for a couple of decades at least Guy!
LikeLike
Hi, enjoyed your article very much. I am just working on a 6105 8110 B I bought over eBay, which has exactly the same goo. Just up to the glued hairspring. But as the wheels show terrible rust on the steel parts, I concluded the watch was flooded with salt water years ago, and left to rot. Best, Eddie
LikeLike