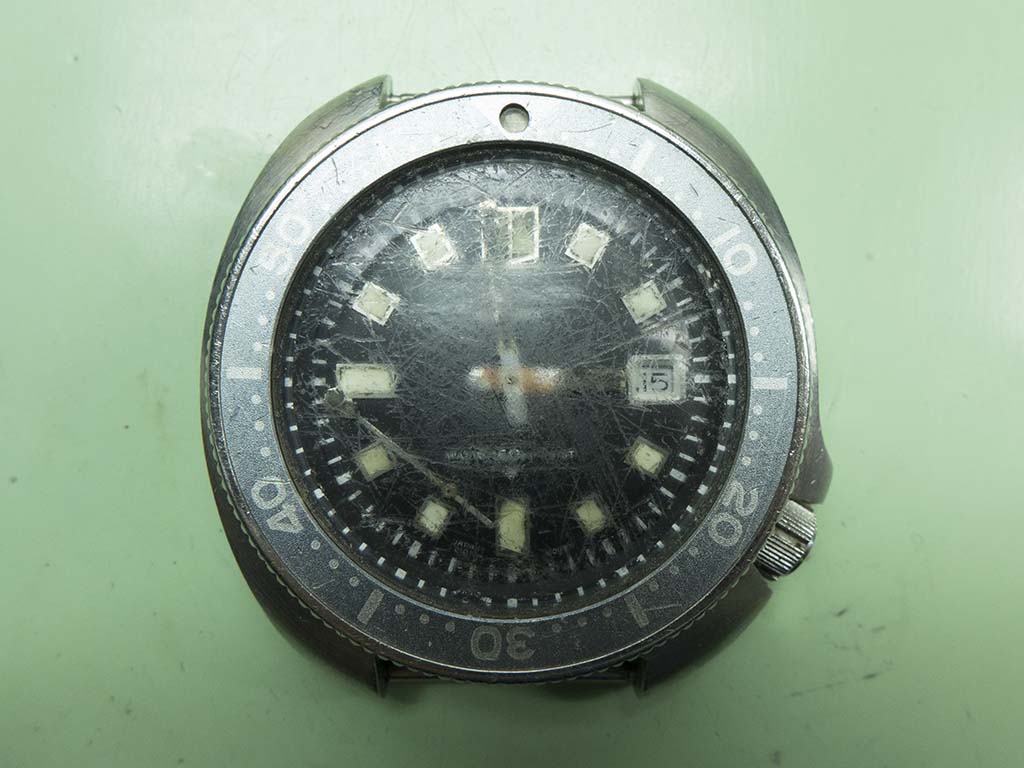
I thought I’d feature this 6105-8110 as it’s an example that actually worked for a living as opposed to being taken for an occasional swim or snorkel! It was bought in the 1970’s by the current owners father who was a professional deep sea diver back in those days. He wore it throughout his diving career and when he’d finished the watch dropped off the radar only to reappear in 2015 when his son was clearing out the garage. He contacted me to see if it could be resurrected as a reminder of his late dad. As you can see it’s had a hard life, the insert has faded to a lovely grey colour but that’s about the only positive I could see! The lume was grotty, the hands were ominously stained with rust and the seconds hand was floating about under the crystal. The movement couldn’t be turned by the crown, everything was locked up.
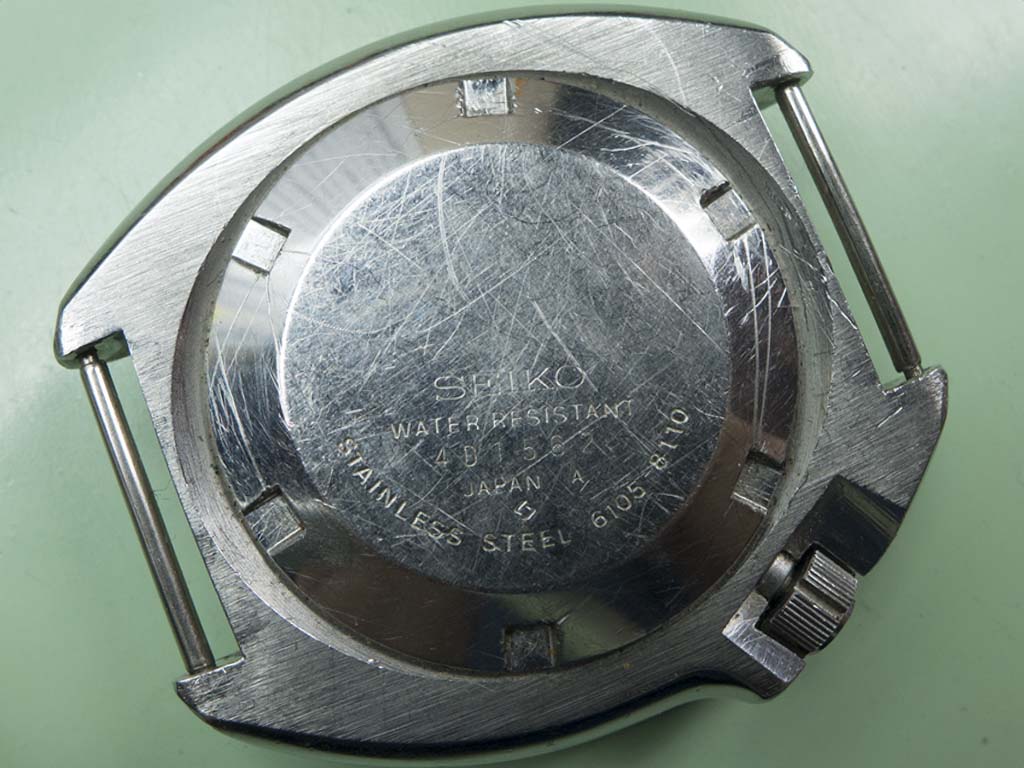
A peek at the caseback shows a production date of December 1974.
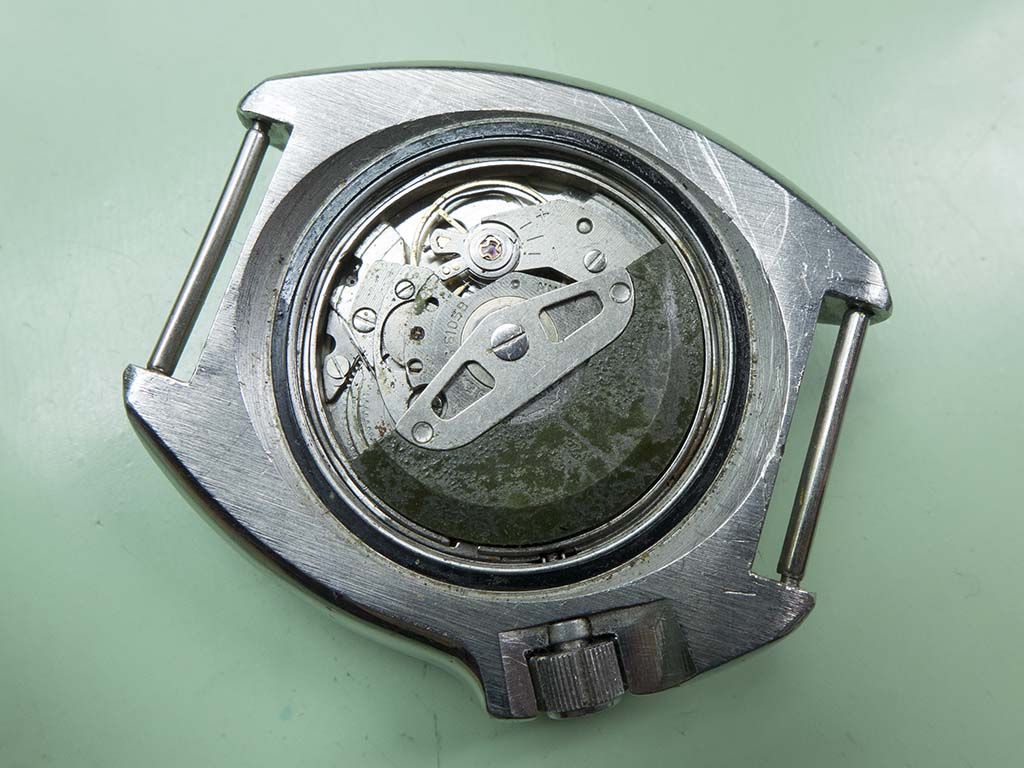
With the caseback removed there was quite a bit of corrosion evident inside, the oscillating weight had the characteristic green whale snot all over it – not the nicest type of corrosion to remove 🙂
A bit further into the movement and some tell tale signs of rust around the barrel arbor.

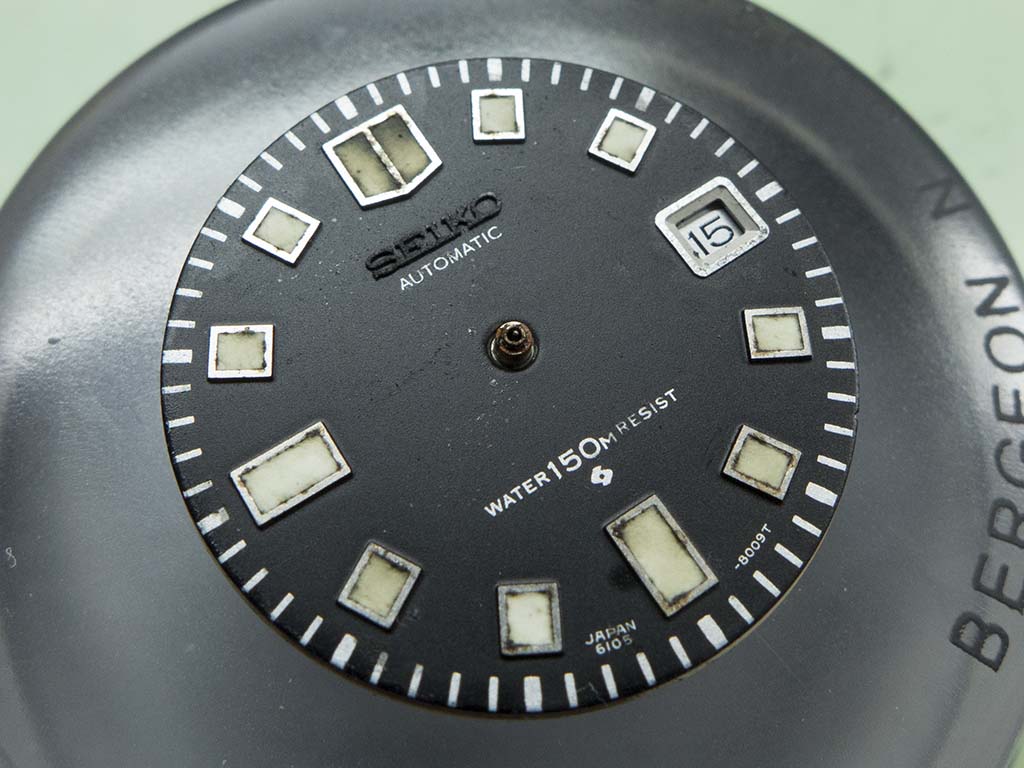
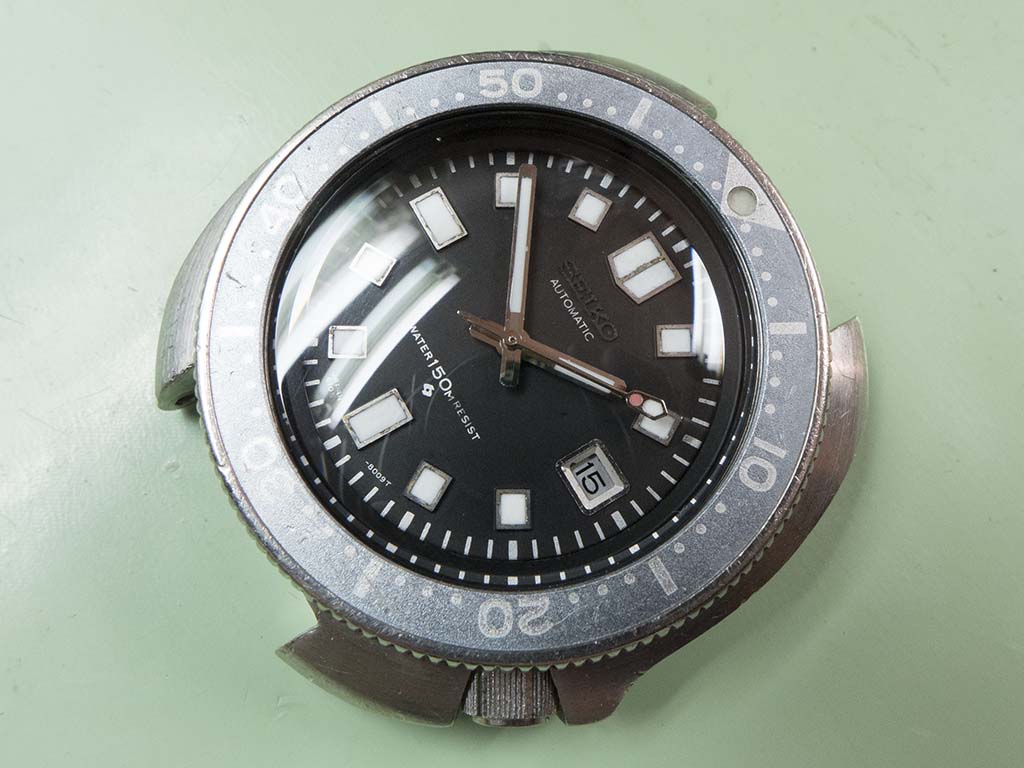
With the movement uncased I got my first decent look at the dial, it’s not great but it’s a lot better than I thought it was going to be. Note how the Seiko logo has corroded almost to black, this would be highly polished when new. I decided to leave it in place as the dials surface was too fragile to start trying to drill it out from behind and I actually quite like the fact it’s a reminder that this watch was used as designed.
The handset was toast, the plating was completely corroded so we decided to get an aftermarket set and relume them along with the dial and bezel pip so everything matched properly.

Before taking the dial off I dug out all the degraded lume compound ready for reluming later.

The strip down went reasonably smoothly from this point….

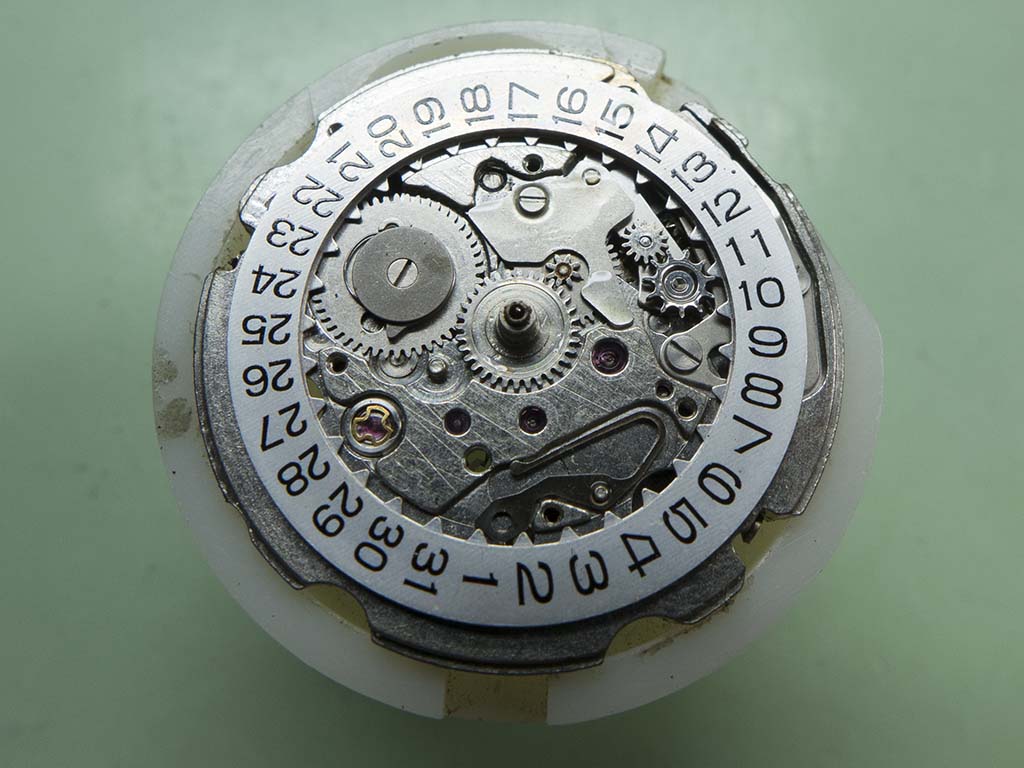

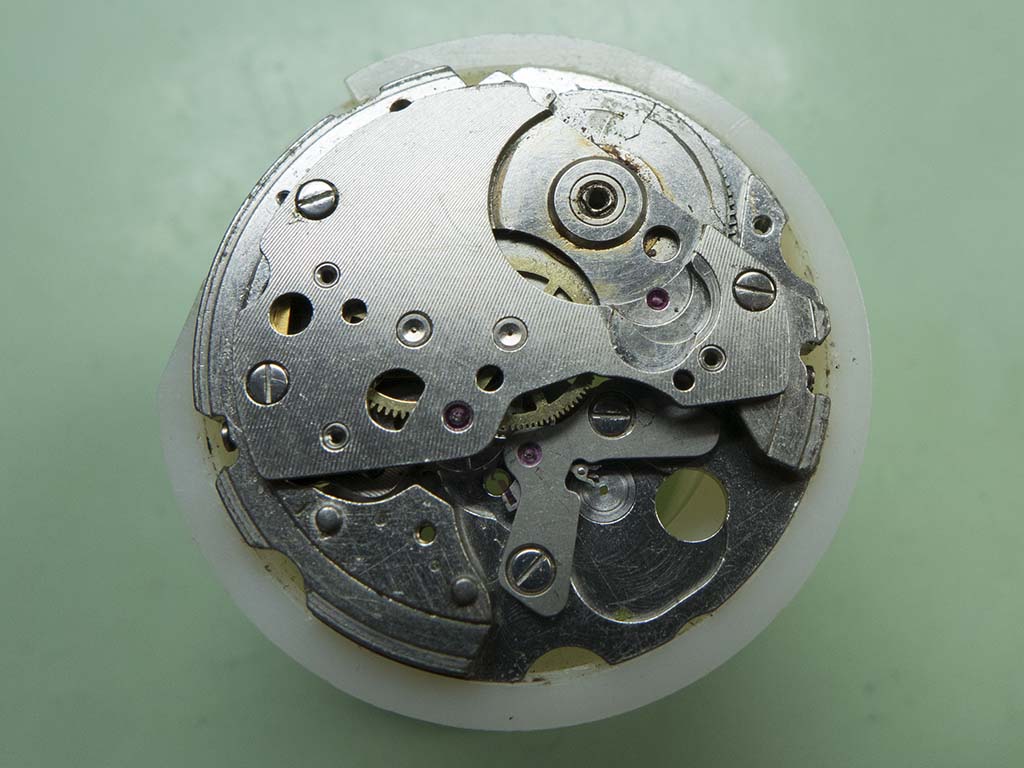
….until I got to here! It’s always a bad sign when wheels come off with the plates, it usually means the pivots are corroded and stuck in the jewels or bearings.

At least the movement came apart without shearing any screws so I was very thankful for that 🙂

It was now ready for it’s trip through my vari-Matic cleaner, coincidentally also from 1974 (although it’s an April one not December)!

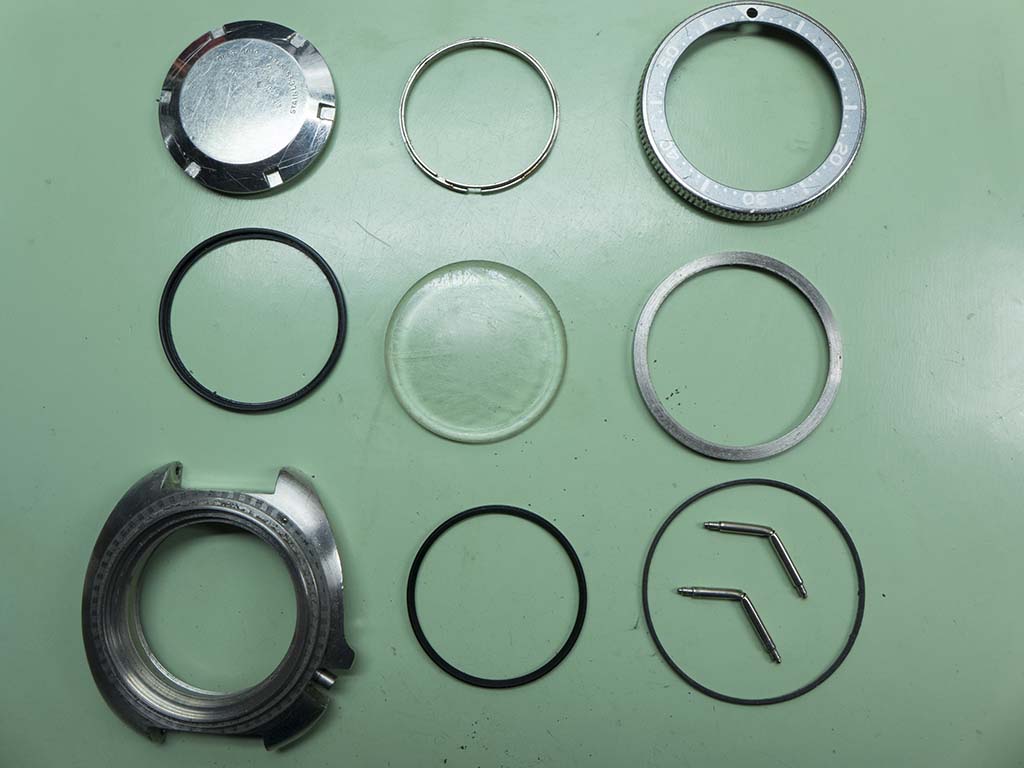
Whilst the cleaning was taking place I turned my attention to the case. The springbars were rusted solid so had to be cut out and everything needed a good ultrasonic clean.
Whilst the movement was still in the cleaner and the case was in the ultrasonic bath I stripped the crown to replace the rock hard o-ring.
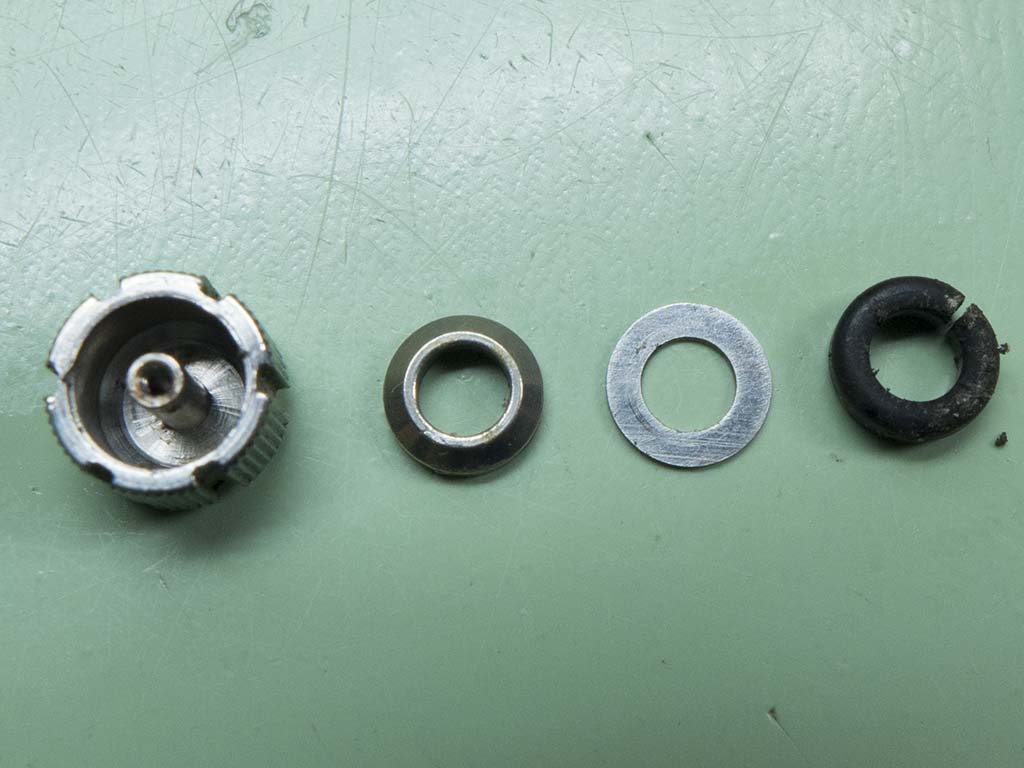
When I put these back together I dish the retaining washer with a suitable stake and anvil. This reduces the diameter slightly due to the dishing effect so I can fit it into the end of the crown and flatten it back out, this will spread it back out and grips it in place nicely.

A new crystal finishes the case work off, I didn’t refit the bezel yet as I needed to relume the pip when I do the handset and dial so it stayed off for the moment.

After inspection the reassembly started with the mainspring and carried on as per normal. A couple of the wheels and the centre wheel bottom bearing were replaced due to corrosion and wear.


The dial spacer was a bit degraded and had a split in it so a NOS one was fitted.

The dial was replaced and the lume work could now take place.

The bezel pip still had it’s little plastic window but the lume had gone from behind. The remnants of the old lume was cleaned out and some new compound added, again from behind.

The after market handset was stripped and lumed to match. I always find the red ‘stoplight’ on these is far too red anyway so it’s always a good idea to lume them to get them looking more period.

The movement was recased….

….and once the caseback was refitted the job was done. I absolutely love the finished look of this one, that faded bezel is fantastic! It’s great that the owner can now have a memento of his dad with him at all times. For me the fact that this watch worked for a living is the icing on the cake 🙂


Terrific feature. The resurrection stories are the best.
LikeLike
recently discovered this blog……..top work……a sympathetic restoration like this really gets my juices flowing..!!!….i know who i will be sending my next watch to..!!
LikeLike
awesome work! I always thought the Seiko logo on these ones is supposed to be frosted, not glossy? (corroded to black means “original dial” 😉 )
LikeLike
You’re correct of course matt ones were used, although I do regularly see polished logos on these. As ever with vintage Seiko it’s never black and white!
LikeLike
Really nice work Duncan.
That insert looks class!
When you mix the lume and place a drop in the lume plots, what are you using to drop the lume in the plots?
Do you place a drop in first and let it spread or force it to the corners and then apply some more, does the consistency allow it to spread easily as I often find maybe I’m using lume mix that’s slightly too thick and struggle to get it to spread before it becomes a little too gooey…
What lume mix do you use also please?
Best,
Guy
LikeLike
I just use an old oil pike to apply it and it usually needs pushing into the corners. It’s all about the mix, too thin and you don’t get the coverage, too thick and you don’t get the self levelling properties which makes for a nicer finish. I honestly don’t know who manufactures the lume I use at the moment, I chap sent me a shed load of different coloured ones for allowing him to use some of my photographs. I have used the Bergeon kits in the past and always found them to be quite good.
LikeLike
Cheers Duncan. Yeh I need to get the consistency better as it’s not self leveling correctly.
Off to Google ‘oil pike’.
“Don’t tell him your name, Pike!”
LikeLike
That story is almost identical to mine the only difference is my Dad is still kicking I hope you can work your magic with his same model I have emailed you already.many thanks, Dave
LikeLike
Hey!
First of all, great job. Now for a question, if I may. How do you go about removing the crown washer? I’m in the process of stripping the crown on mine, and I’m trying to use a hole punch to dish the washer in the hope of reducing it’s outer diameter (and eventually using the reverse procedure when putting it back together). It feels like it’s just about to come off, but it’s not quite there yet.
Thanks!
LikeLike
You’ll do more damage than good with that method. I use loads of small o-rings which I pack into the crown then use a sleeve to compress them (with enormous force) which will eventually break the crimp and pop the washer off.
LikeLike
Wow…fantastic. Thanks for taking the time!
LikeLike