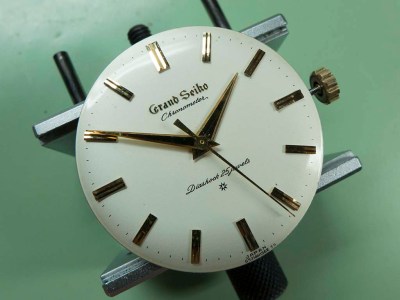
This lovely Grand Seiko arrived in a non running state, the power couldn’t be wound on so there was obviously a problem with the mainspring or barrel. The Grand Seiko line was introduced in 1960 with the introduction of the calibre 3180 and continued in various guises until 1975 when it took a 13 year sabbatical. The brand was revived with introduction of the Grand Seiko 95SG quartz in 1988. The subject of this article is the original Grand Seiko, a calibre 3180 beauty, a manual wind, 18,000bph, 25 jewel, self certified chronometer grade movement. It was certified internally rather than by the Swiss COSC body, but to standards even more stringent than the Swiss organisation’s. The original Grand Seiko went through a few subtle changes during it’s 4 year life span, notably the distinctive Grand Seiko script on the dial started out being printed directly onto the dial in black, it then went to being carved into the dial and finally applied in gold as in the one featured. The cases were all 14K gold filled (as in rolled gold, a thicker version of gold plating) but a few were produced in platinum. I’ve yet to see a platinum cased example but I do know the owner of the one featured here has one complete with it’s original box and all it’s chronometer certificates. I’m not envious at all 🙂
The snap on caseback has the lion rampart emblem with the Grand Seiko script above.
The inside of the caseback shows a production date of April 1963 and also displays the model number using Seikos pre 1965 numbering system, in this case J14070GS.
Being a high end Seiko movement it carries its own serial number as was the custom back then.
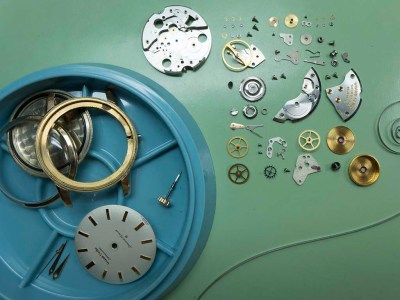
Because the case construction is of the traditional type the movement has to be withdrawn from the dial side, so to prevent any possibility of damage I remove the balance assembly first. I also removed the three diafix springs and end jewels whilst I was at it.
The case is turned over and the bezel and crystal is popped off. This allows the movement to be withdrawn assuming the two movement clamps have been removed from the other side of course.
Again, as this is a traditionally constructed watch I remove the hands before removing the movement to prevent any possibility of damage. This dial is in particularly fine condition, it doesn’t take much for the atmosphere to creep under the dial lacquer on these vintage Seikos so to see one in such a fine state of preservation is a joy.
With the dial removed you can see that the mechanism below is relatively straightforward.
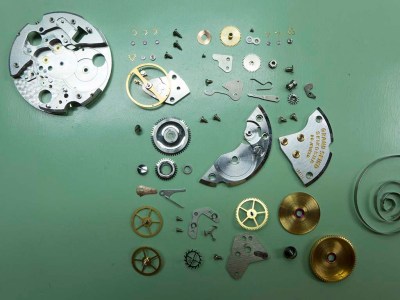
Stripping this side didn’t take very long.
With the movement turned over the going train could be tackled next.
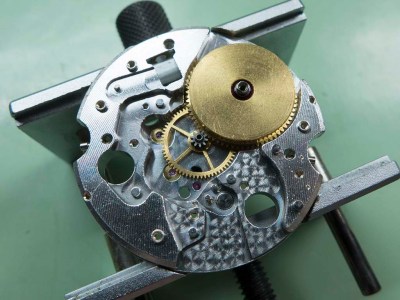
Note the perlage decoration around the balance area.
Also of note is the hacking lever, a feature that wasn’t to reappear for many years on the majority of the Seiko range, and the fully jewelled barrel which has jewels in the barrel and the lid. This is a very functional feature as I find most of the issues with amplitude on vintage watches stem from problems with barrel wear. The only drawback with the jewels comes at service time when you pray you don’t crack one getting the lid off 🙂
With the lid successfully removed you can instantly see the cause of the non running!
This now meant the watch was ready for the cleaning and inspection phases.
Once this was done the watch was stored until the new mainspring arrived.
As soon as it arrived the reassembly commenced.
With the train bridge back on the diafix caps and spring have to be refitted.
The lyre shaped springs are supposed to be able to be left in their housings when cleaning takes place. This is fine when the watches were new but after many services they tend to lose there shape slightly with the result I’ve lost more of these in my Vari-Matic cleaner than any other component! These days I remove the springs completely and refit them once the cleaning is done. The two side clips are slid under the housings lip and the spring is pushed right back to allow the end stone to be refitted.
The reservoirs are primed with the correct oil and the cleaned end stones are replaced.
The springs are then pushed back over the end cap and the top tab is tucked under the lip, this holds the cap in place in three separate locations.
With the balance replaced the movement ticks away nicely so the power is wound on and the beat is adjusted and the movement roughly timed on the timing machine.
The dial side is tackled next.
Dial and hands are replaced….
….and the movement is replaced in the case.
The clamps are replaced….
….and the caseback is pressed back on. Another beauty finished! I’ve worked on a number of these over the years but I have to say this has to be one of the best preserved I’ve seen 🙂


2 comments